Mapping Network Storage
Remote N: and S: Drive Access
CSBS Computing strongly encourages students, faculty, and staff to take advantage and make use of the college's network storage options. Network storage is backed up regularly, accessible from any campus computer and the virtual lab, and allows the most broad availability of your data with university equipment and services.
Storage Definitions:
- N: drive -- non-shared documents and folders (accessible only by you)
- S: drive -- shared folders (accessible by multiple users).
The CSBS network storage servers are accessible using a wired campus network connection. They are not accessible on wireless connections until you connect to the Departmental VPN service.
Windows Drive Mapping
If your N: or S: drives are not mapped automatically, or you are connecting off campus, you can follow the steps below to get connected.
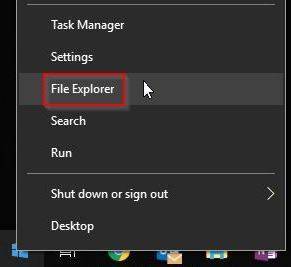
- Open File Explorer by using the taskbar item, or right click on Windows Start button
(bottom left corner) and select "File Explorer"
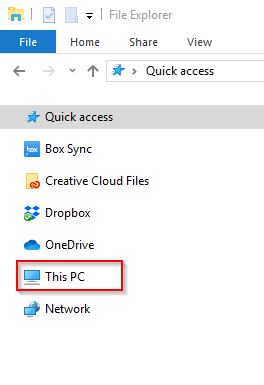
- Click on "This PC" from the navigation pane on the left if File Explorer does not
open to that folder
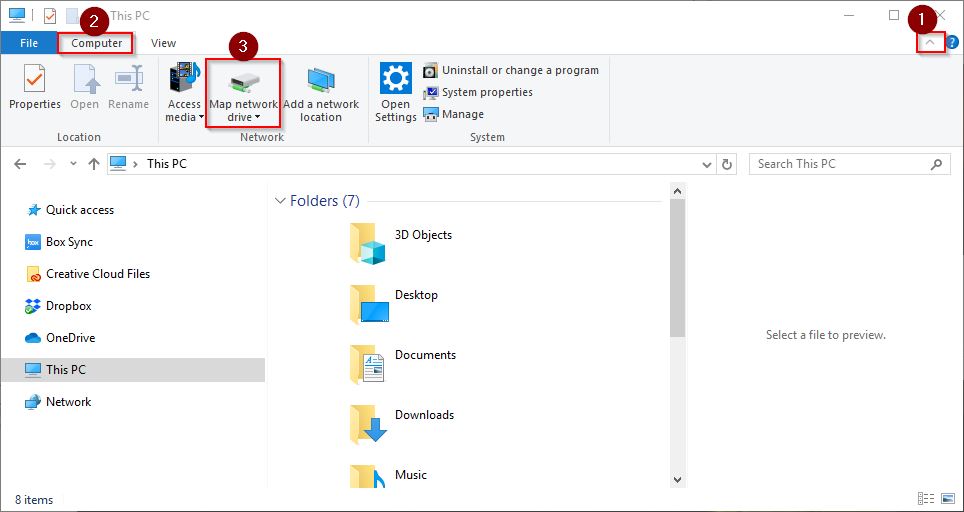
- Select Map Network Drive
- Windows 11: Click the three dots menu and select "Map Network Drive"

- Windows 10: Expand the Ribbon (1), ensure you are on the "Computer" tab (2) and select
"Map Network Drive" (3)
- Windows 11: Click the three dots menu and select "Map Network Drive"
- Select N: for "Drive:"
- Enter the following in the "Folder:" prompt: \\csbs-dfs.csbs.utah.edu\home\unid
(replace unid with your UNID, starting with 'u', i.e. u1234567) - If you do not normally log in to your computer using your UNID, check the box labeled
"Connect using different credentials".
Optionally select the Reconnect at sign-in if your computer is normally connected to a campus wired network when you login.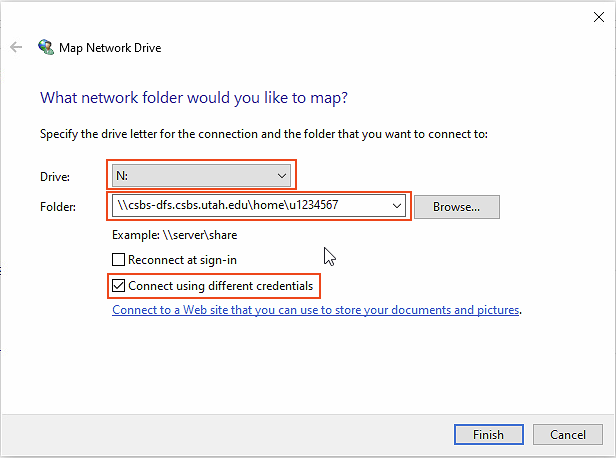
- Click Finish
- You may be prompted for your username and password, modify your username by
prepending 'AD\' (i.e 'AD\unid' ).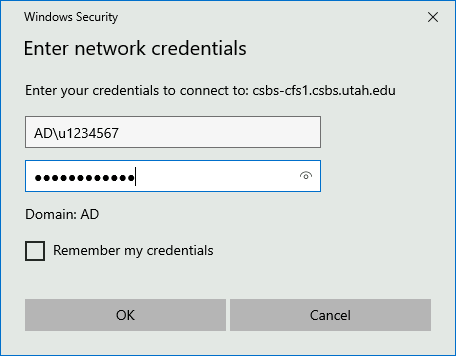 Enter your password and click OK
 - The N: drive should now show up in Explorer, under "This PC" in the "Network locations" section towards the bottom.
If your S: drive is not mapped automatically, you can follow the steps below to get connected.
- Windows 10/11: Right click on Windows Start button (bottom left corner) and select
"File Explorer"

- Click on "This PC" from the navigation pane on the right if Explorer does not open
to that folder
- Select Map Network Drive
- Windows 11: Click the three dots menu and select "Map Network Drive"
- Windows 10: Expand the Ribbon (1), ensure you are on the "Computer" tab (2) and select
"Map Network Drive" (3)
- Windows 11: Click the three dots menu and select "Map Network Drive"
- Select S: for "Drive:"
- Enter the following in the "Folder:" prompt:
\\csbs-dfs.csbs.utah.edu\share - If you do not normally log in to your computer using your UNID, check the box labeled
"Connect using different credentials".
Optionally select the Reconnect at sign-in if your computer is normally connected to a campus wired network when you login.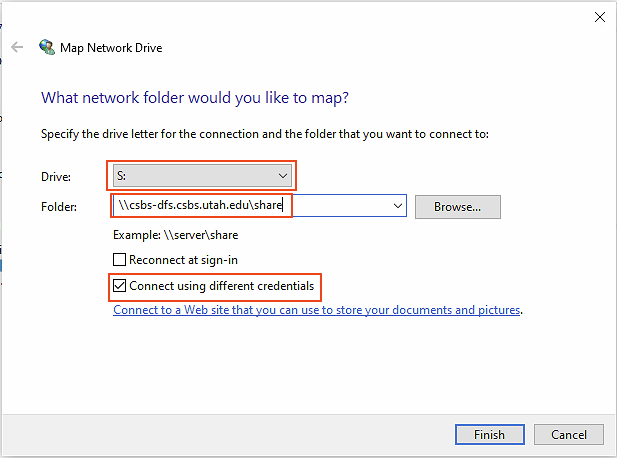
- Click Finish
- You may be prompted for your username and password, modify your username by
prepending 'AD\' (i.e 'AD\unid' )Enter your password and click OK - That drive should now show up in Explorer, under "This PC" in the "Network locations" section towards the bottom.
Apple macOS Drive Mapping
While Macs do not use drive letters, you can map to one location for personal storage (home) and another location for access to shared folders (share).
If your N: drive (home) is not mapped automatically, you can follow the steps below to get connected.
- Open Finder
- From the "Go" menu at the top of the screen, select "Connect to server".
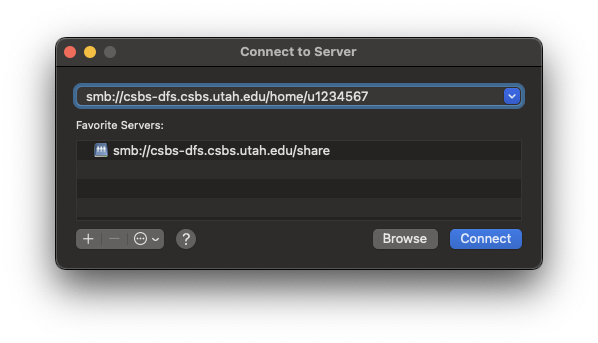
- In the "Address" text box, type "smb://csbs-dfs.csbs.utah.edu/home/unid" (without quotes, case sensitive, replacing UNID with your UNID)
- (Optional) You can click the '+' symbol to remember the connection in a favorite server list.

- Click "Connect"
- At the user name and password prompt, type your UNID credentials (AD\unid) and password.
- Click "OK"
If your S: drive (share) is not mapped automatically, you can follow the steps below to get connected.
- Open Finder
- From the "Go" menu at the top of the screen, select "Connect to server".
- In the "Address" text box, type "smb://csbs-dfs.csbs.utah.edu/share" (See above image)
- Click "Connect"
- At the user name and password prompt, type your UNID (AD\unid) and password.
- Click "OK"