Virtual Lab
The Virtual Lab is a service provided by CSBS Computing that allows students access to selected University-licensed programs from virtually any computer with an internet connection. Supported platforms include Windows, Mac OS, Linux, iOS, and Android. Check out the list of available applications in the Virtual Lab.
Setup for Windows and macOS
On a desktop computer, there are four major steps to using the virtual lab for the first time. If you need to access the lab from a mobile device, please refer to the section labeled "Connecting to the Virtual Lab with other devices" at the end of this guide.
Using a web browser
|
--- OR --- |
Open the Citrix Workspace application
|
-
- Citrix StoreFront displays available applications in the web browser, similar to the
screenshot below:
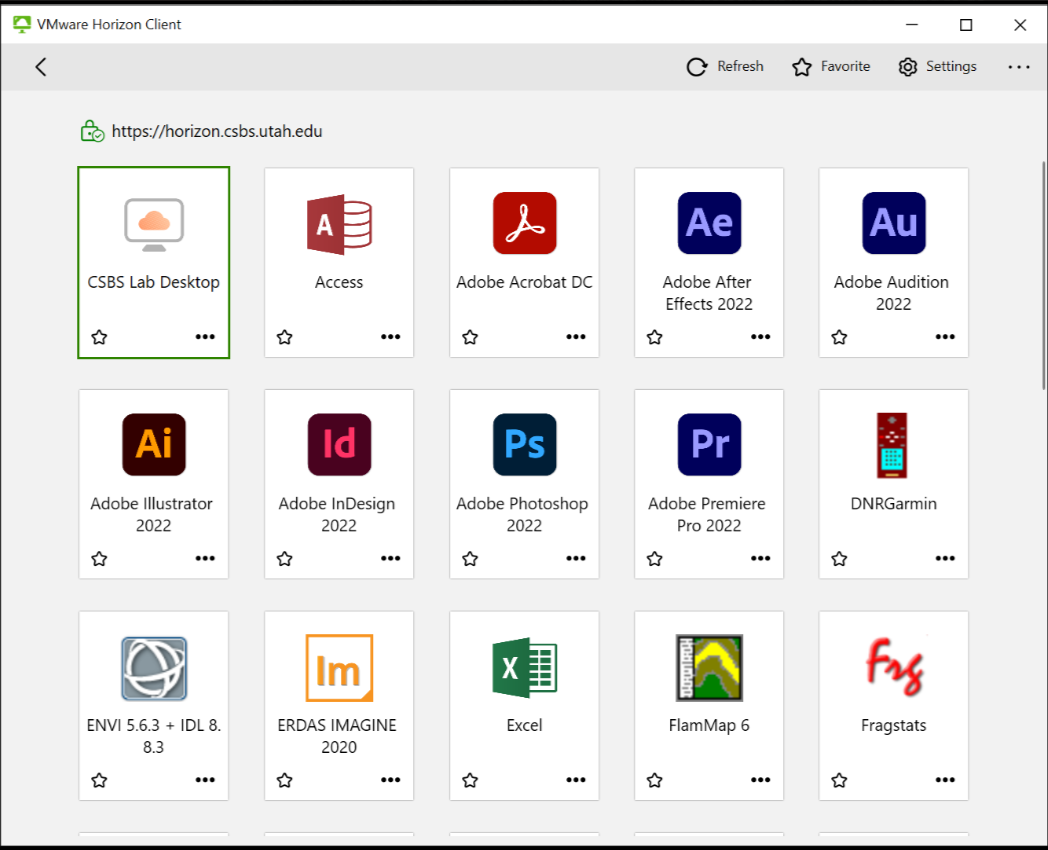
- Locate your desired application and click on its icon in order to launch it. Alternatively you can search for the application you need with the search bar in the upper right. After a brief wait, the application should launch.
- Citrix StoreFront displays available applications in the web browser, similar to the
screenshot below:
How to access files from the Virtual Lab
There are multiple methods you can use to access files in the Virtual Lab.
- University Box account through our Cloud Storage Integration portal
- Provisioned network storage (N: or S: drive)
- Your local files or a USB drive
Accessing Cloud Storage using Box
To access files from your Box account, follow the Cloud Storage Integration instructions here. Then, simply open your files from the I: drive within the application.
Accessing network storage
You can request to have your account provisioned for network storage. Once provisioned, any CSBS-managed computer you log into will have the drive letter N: where files can be stored and accessed.
Accessing local storage
Local files are only available logging into the virtual lab directly through Citrix Workspace. When you login the first time, you should see a prompt to allow access from Workspace to your local files. Click "Permit all access".
When you select 'File-> Open' from within a lab application, you will see the below: (example here is from SAS)
The highlighted drives refer to your local computer, the names here may vary slightly, as the (C: on IMUNDO) portion will be replaced with your computer name. C: on [computer_name] will go to the base of your file structure, and H: on [computer_name] will go to you user home. Navigate to your files and open them.
Troubleshoot opening files saved to your computer
Windows file permissions (access to local files)
- Open your application from StoreFront
- Right click on the Workspace icon in the taskbar and select 'Connection Center'.
- You may have to click the small up arrow to see this taskbar icon.
- Highlight the VDA and select 'Preferences' from the right hand side.
- You will not be able to click on 'Preferences' unless the VDA is highlighted.
- Ensure 'Read and Write' is checked under the File access tab and select 'Apply', then 'OK'.
- You will not be able to click on 'Preferences' unless the VDA is highlighted.
Mac file permissions (access to local storage)
- Open Workspace and login directly following the steps listed above.
- Opening a file from your computer for the first time should trigger a permissions request. Besure to assign Read and Write permissions. If the prompt does not appear, proceed through step 3.
- Click on the Workspace icon in the menu bar and select 'Preferences'.
- Click on the 'Devices' tab and ensure the 'Read and Write' radio button is selected.